#include "colors.inc"

camera
{
  location  <0,0,-10>
  look_at   <0,0,0>
}

light_source
{
    <-10,10,0>
	color White
}

background { color Cyan }

sphere
{
	<0,0,0>, 1
	texture {pigment { color Red } finish{specular 1}}
}
So, what's going on? Let's break down the parts of the model. This file, like every POV file, has at least one "camera" and one "light_source". You need a camera to take pictures with, and a light_source to shine on any objects you might be observing.
Every point in space is labeled with three numbers: x, y, and z. The coordinate system we use will have x increasing to the right, y increasing upward, and z increasing into the screen:
camera
{
  location  <0,0,-10>
  look_at   <0,0,0>
}
It says that the camera is located ten units in front of the screen. It's looking at the intersection of the axes, or the origin.
The light is located up and to the left of the origin:
light_source
{
    <-10,10,0>
	color White
}
It's sitting above the negative x axis. If you look at the picture, you can see the light shining on the ball to the left. That's above the negative x axis.
Now, we make up the scene. The background (or sky) color is Cyan, a light blue:
background { color Cyan }
Cyan is a color name that POV knows about. It knows about a large number of colors, and you can specify your own.
We place a single ball, or sphere, at the origin, it has a radius of 3:
sphere
{
	<0,0,0>, 3
	texture {pigment { color Red } finish{specular 1}}
}
The "texture" specifies the kind of paint you use on the ball. This paint is Red, and is very shiny.
Do this: Change the number after the word "specular" to zero. It makes the paint "flat" or "not shiny". This is the image:
Do this: To select a new for our sphere, we can pick a special color of our own:
- Change the background color command to the following:
background { color red .5 green 0 blue .5 }This changes the image so that it has a purple background:
Do this: Now, let's create a new picture. You can either start a new file, or delete the contents of the model window (select "Select All" from the "Edit" menu, and press delete.). Now, copy the following model file into the model window. It's long, but press the mouse at the top and drag downwards until the end. Then paste it in the model window.// Comments have two slashes beforehand #include "colors.inc" #include "textures.inc" background { color White } camera { location <-10 , 0, -10> look_at <0,0,0> } light_source { <-30,20,-20> color White } sphere { <0,0,0>, 1 texture { pigment { checker // checkerboard pattern, made up of two pigments: pigment { Jade } // a type of rock! pigment { wood scale 0.2} // wood, with grain } finish{specular 1} } scale 6 }This is a checkered sphere with two different types of pigment: a Jade like stone, and a wood color: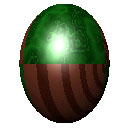
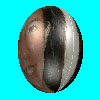
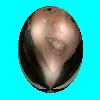
Do this: We can even map a picture onto the sphere. To be ideally, the picture should be twice as wide as it is tall. Here's an example, you can save as "heather.gif":
#include "colors.inc"

background { color Cyan }

camera
{
    location  <0, 0, -10.0>
    look_at   <0,0,0>
}

light_source
{
    <10,10,-10>
    color White
}
light_source
{
    <-10,10,-10>
    color White
}
light_source
{
    <1,-10,-10>
    color White
}

sphere { <0,0,0>, 4
	texture {
        pigment {
            image_map { gif "heather.gif" map_type 1 }
        }
        finish{specular 0.5}
    }
	rotate 0
}
Here's what Heather looks like, mapped to a sphere: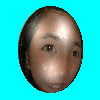
Do this:We now have one more simple image: some text. This is ideal for making up headings for home pages:#include "colors.inc" #include "textures.inc" camera { location <0 , 0, -15> look_at <0,0,0> } light_source { <-30,20,-20> color White } light_source { <30,20,-20> color White } // A background screen: plane { z, 20 pigment {color White}} text { ttf "timrom.ttf" "duane" 0.5, 0 // text is 0.5 units thick pigment { Jade } translate <-1.25,0,-0.25> // move the text to the left, and backward scale 5 rotate 0*z }This image has two lights shining on the word "duane" against a background screen. The screen is a sheet or a "plane" that is 20 units away on the z axis. The result is the following image:
Do this: Change the rotate command so that it readsrotate 45*z
When you render the image, you get the following:
Experiment by using your own name. Take the PICT file and save it as a JPEG file in PhotoShop. You can then add it to your web page!
Try this: This program is just like the last, except for the very last line. We change the rotate command so that it rotates around the z axis by an amount called "clock":#include "colors.inc" #include "textures.inc" camera { location <0 , 0, -15> look_at <0,0,0> } light_source { <-30,20,-20> color White } light_source { <30,20,-20> color White } // A background screen: plane { z, 20 pigment {color White}} text { ttf "timrom.ttf" "duane" 0.5, 0 // text is 0.5 units thick pigment { Jade } translate <-1.25,0,-0.25> // move the text to the left, and backward scale 5 rotate clock*z }If we make "clock" run from 0 to 360, the text spins about the axis, making an animation:
- Copy the text into the model window.
- Go to the Edit menu, and pull it down to Preferences, and then over to "File Rendering". You will see a display
like this:
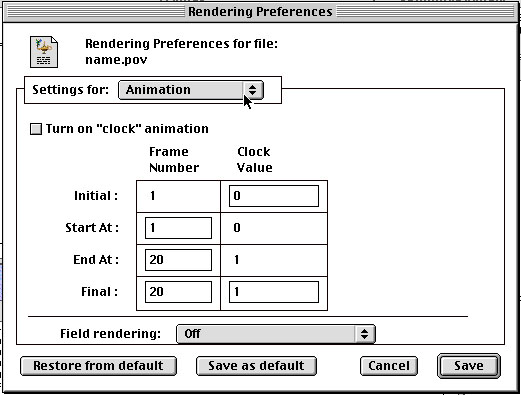
- Click on "Turn on clock animation". This makes the "clock" variable drive the animation.
- Set the Initial clock value to 0 and the Final clock value to 360.
- Press Save.
- Pull the Render menu down to "Start Rendering". It will render 20 frames with values of clock between 0 and 360. This will cause the text to spin all the way around. Each of the frames will have a name like "Untitled0001". You can use these frames to build an animation from PICT files!